
Tripods For Photography: The Essential Kit We Love To Hate

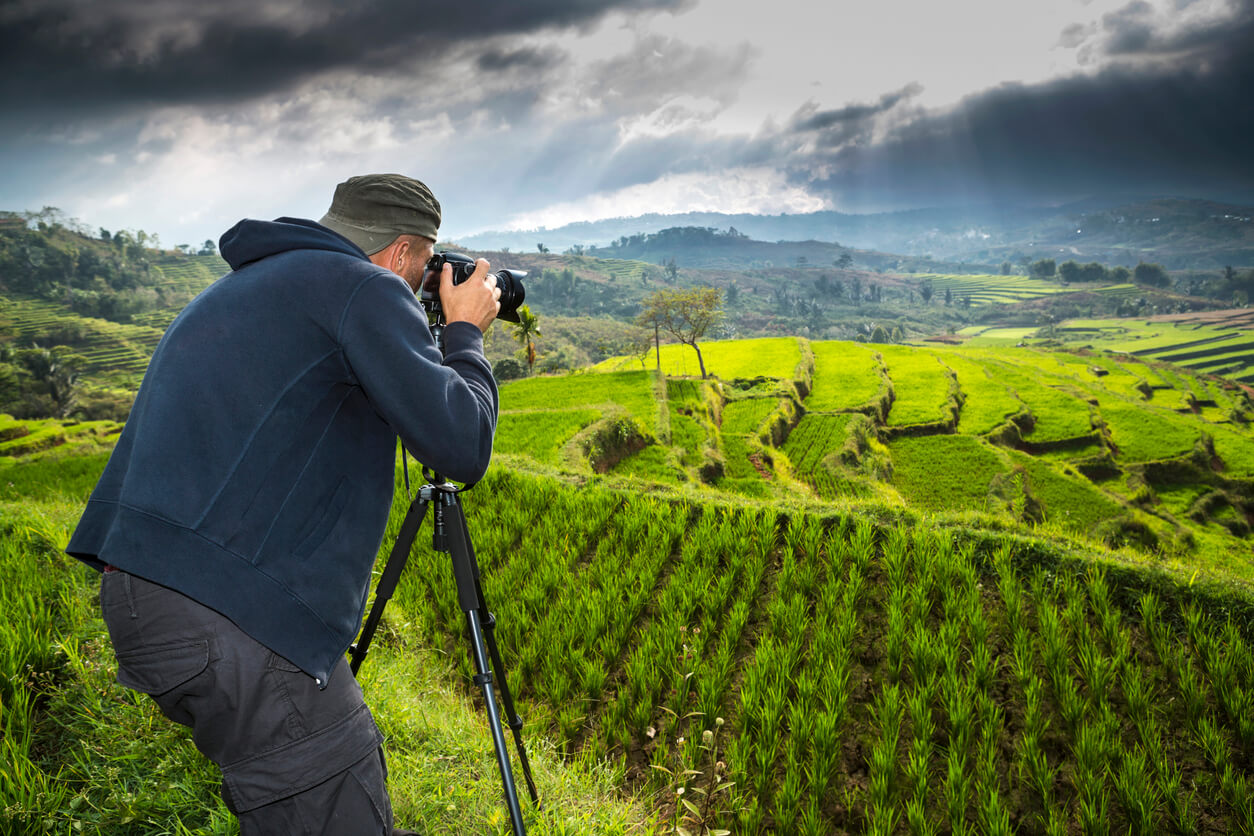
Let’s be honest. Almost every photographer hates carrying a tripod. They can be heavy and cumbersome, tiring on the back, often slow and fiddly to use. As well as this, they also slow down the photographic process and remove all sense of spontaneity and ‘quick response’.
And yet, those of us who’ve been involved in photography for a while still persist with them. Why do we do it? It's certainly not due to any sense of masochism, the need to inflict pain on oneself in the name of our beloved art. Instead, it’s down to a hard-earned realisation that the tripod is an essential piece of kit and one that’s critical to the creativity and quality of our photography. You must have a tripod for many forms of photography if you intend to produce top-quality imagery.
Why use a tripod for photography?
In some forms of photography, a tripod is indeed a hindrance. This is mostly in street photography or in forms of sports photography where spontaneity, lightning reflexes and (often) unobtrusiveness are key. However, more often than not, a tripod is critical – especially in landscape, macro and interiors photography. These are genres where slow shutter speeds are often the norm, making hand-held photography difficult to manage. It’s just about impossible to hold a camera rock steady for several seconds.
So, it's all about stability: keeping the camera fully stationary when a slow shutter speed is in use or when the slightest camera shake would result in a blurred image. While it’s sometimes easy to detect when this is likely to occur (such as when photographing a city skyline at dusk or night-time), there are times when it’s less obvious. For example, light levels may appear perfectly good enough for hand-held photography during the day – but even then, you might still want to use a slow shutter speed and hence a tripod. Why?
The answer lies in creativity and quality maximisation. Particularly in landscape, macro and interiors photography, it’s usually important to maximise depth of field – that is, the amount of the image view in focus. There are two main ways of doing this. One way is to use a narrow lens aperture, restricting the amount of light passing through the lens from the outside world to the camera's sensor. This light restriction has to be compensated by the use of a slow shutter speed or long exposure time, which even in good daylight is impossible to be done hand-held. The solution? Reach for the tripod.
But surely, you can overcome the problem of exposure time caused by the narrow lens aperture simply by putting the camera's ISO up and increasing the sensor's sensitivity to light? After all, the higher the ISO, the more sensitive the sensor, enabling it to work effectively even in lower light levels, making hand-held photography possible.
This is true up to a point, but there’s a significant price to pay. As the ISO increases, image quality deteriorates – even in today's superb cameras. This is fine if you're just taking quick snaps, but if you're after top quality, fine-grained and high-resolution images, high ISO is a total no-no. The tripod wins every time.
The tripod is essential to creativity, something which high ISO completely works against. One of my personal favourite creative techniques is to blur movement within the image scene, which, again, requires a slow shutter speed. Increasing the ISO to allow hand-held photography will result in your shutter speed being too fast and thus significant blur. However, with the camera firmly mounted on a tripod, you can use as slow a shutter speed as you like, resulting in an image in which the stationary parts are pin-sharp and the moving parts beautifully blurred. Think flowing streams, rolling coastal surf, the flowing taillights of evening urban traffic, to name just a few. All absolutely require a tripod.
So, given that I've given the case for why a tripod is an absolute must, what should we look for when buying one? Let's start by describing a tripod's parts.
What is a tripod?

As the word implies, a tripod consists of three legs, which together support a head on which we mount a camera.
All tripods consist of two main parts: the legs and the head. So, let's examine these two main components.
The tripod legs
The legs open out into a neat and stable triangle when set up. Each leg comes in several sections – usually three, but sometimes two or four. When the tripod is properly set up, these are locked into position with bolts or clamps. For ease of carrying, the legs can be pushed back together, with the thinner, lower sections sliding up inside the wider upper section(s), again being locked in place. This part of the tripod also usually contains a central column significantly shorter than the legs to directly support the head, which can be racked upwards to raise the head and camera higher up than the legs alone might allow.
The tripod head
This is the often rather solid-looking structure sitting at the top of the tripod on which the camera is mounted. The head is responsible for holding the camera firmly and safely in place and for allowing the photographer to point the camera at the subject at various angles: looking up, looking down, mounted horizontally, mounted vertically, and so on. Though small, it’s arguably the most important part of the tripod.
Variations of tripods: size, stability and portability

Tripods come in a vast array of sizes and designs, ranging from miniature table-top forms right up to behemoths that can raise the camera two metres or more above the ground. So, it's not surprising that people often find it difficult to navigate a path towards the right one for them.
Unfortunately, there is no single tripod that can do everything. However, the best thing to do is examine the kind(s) of photography you do, plus the kind and size of camera and lenses you use, and from there, work out the best type of tripod for you.
This may sound blindingly obvious, but it’s surprising how often I see photographers using a tripod that’s completely inappropriate for their camera gear – usually one far too small, light and flimsy. Photographers can be tempted to skimp on their tripods in the quest to minimise costs. However, the result is a structure simply not strong or stable enough to safely support their camera, which results in a top-heavy mess once the camera is mounted. The last thing a photographer ought to risk is to have their tripod topple over, as this can cause terminal damage to very expensive cameras and lenses.
So, make sure you invest in a sturdy tripod, especially if your camera is any form of DSLR (or indeed a mirrorless camera) since sturdy usually means stable. As a general rule, you want a tripod that can hold the camera close to eye height. To hold a camera safely at that height, the tripod legs need to be quite well spread, and the various sections completely rigid and wobble-free once extended and locked.
Of course, while stability is the critical requirement when a tripod is in use, portability is the main consideration when it isn't. Although you need a sturdy tripod, you don't want one too heavy or too big when you have to carry it. So, weight and folded size are important. Most tripod legs are made principally of aluminium, which is reasonably light, though you sometimes might not think so when the three legs, central column and head are combined! There are various carbon fibre tripods on the market, which massively reduce weight without reducing tripod size. However, it can reduce stability, particularly in windy conditions – though this problem can often be solved with the attached hook.
Besides weight, size is also a major consideration to portability. Of course, both weight and size can be reduced simply by having a smaller tripod, but this can then limit the tripod’s photographic usefulness, so you don't want to cut this too far. This is where the telescopic legs come in because the more sections the tripod legs have, the smaller the tripod can become for portability while still maintaining its height for use. However, the problem here is that the more sections there are, the thinner and hence potentially weaker the lower sections will be. In tripods with four or more sections, the lowest section can be very thin, which could compromise stability. That’s why most tripod legs come in three sections – this is seen as a good compromise between strength, stability and portability.
A final consideration for the legs is how well they spread. Most of the time, when the tripod is in use on level ground or an interior floor, you'll want the legs spread evenly and at the same height. But what about when you're on rough, sloping ground? In these conditions, not only will you want to have the legs at different lengths – to account for the slope and keep the tripod head level and stable – but you might also want or need to spread the legs unevenly and more widely than normal to gain extra traction and stability, and sometimes to make it possible to bring the camera close to the ground (e.g. for photography of plants). Today, most tripod models allow the legs to move independently of each other and open to extra-wide angles, making all this possible. However, a few have the three legs linked by bars that meet at the central column, making independent movement and extra spreading impossible. This design helps to provide extra strength and stability in a tripod that would otherwise be too lightweight, but it makes for limited usefulness on anything other than level ground or a floor.
Getting the tripod head right

The head is the vital block at the top of the tripod onto which the camera mounts. It has to be strong, rigid, and reliable to hold the camera stably.
Although heads come in multiple shapes and sizes, there are essentially two major design types:
- Ball and socket
- Pan and tilt
With the first, the head consists of a socket housing a ball joint, on top of which sits a plate and fitting to screw into the bottom of the camera. The ball joint (and hence mounted camera) is locked in place by a locking screw. Releasing this screw enables the camera to be moved around into various angles and positions.
The pan and tilt heads usually consist of three locking levers that each separately allow the mounted camera to be moved in one plane: rotation, tilting up and down, and moving between horizontal and vertical orientations. Moving the camera in one plane at a time is certainly slower than the multi-directional movement of the ball head, but on the other hand, you have the certainty that once the camera is locked in any one or two of the planes, it will stay there while you fix the third.
Some pan and tilt heads consist of just two locks – one to move the camera between horizontal and vertical positions and a second coupled with a long lever to control both rotation and up and down movements. Some heads allow the camera to be fitted only horizontally, making vertical shots impossible. These tripods are intended for video work and should not be used for still photography.
Then, there is the critical step of mounting the camera onto the head. Regardless of the type of head, there are essentially two mounting methods:
- A locking nut protrudes through the head's base plate and screws into the bottom of the camera. It's simple and effective but can be fiddly and doesn't always lock as firmly as it should.
- The camera and head's base plate are linked via a quick-release plate. This comes as an integral part of the tripod head. Pulling a spring-loaded lever releases the plate, which is then screwed into the bottom of the camera. This plate is then clamped onto the head using the spring-loaded lever. The camera can be quickly removed from the tripod head simply by releasing the lever, allowing for quick transitions between tripod and hand-held photography.
The quick-release plate system works well, and for me, is the preferred option. Just don't lose the plate! To avoid this, I keep it permanently attached to the bottom of the camera.
Bringing the tripod head and legs together

Many simpler and cheaper entry-level tripods come as complete tripods with the legs and head together. While this is perhaps fine for initial learning and mounting a phone or compact camera, they’re generally not sufficiently stable or strong for mounting most DSLR or mirrorless cameras.
For these, you need to use advanced models for which tripod legs and heads are sold separately. This, of course, provides the option of mixing and matching different head and leg designs but opens up the risk of getting a head and leg combination that’s not a good match: i.e. buying a head that’s too big and heavy for the legs. If in doubt, ask for advice from the retailer.
One final point to mention is the humble spirit level. This helps you ensure that the camera is level. There should be at least either one circular or three linear levels on the tripod head to check for camera alignment, and ideally, a circular one at the top of the tripod, enabling you to also check whether the tripod itself is completely upright.
Tripods for photography: conclusion
To repeat the earlier sentiment – no single tripod can do everything. So, when buying one, select the type that’s most likely to be of greatest use in what you do. You don't necessarily need to blow a huge budget, but don't skimp either – the worst thing you can do is have a tripod that’s too flimsy, wobbly and simply inadequate to safely hold your expensive camera.
The right tripod for you is one that has the right compromise between stability and portability, which can be quickly and easily set up and dismantled. It must also be able to hold your camera completely securely, and at the same time, have a quick and easy attach and release mechanism.
A final consideration is the availability of spares. It’s always worth checking this before opting for any particular tripod because things will inevitably break, and it’s infuriating having to throw away an entire tripod simply because one locking nut has failed.
Once the tripod is in hand, just get out there and start using it. You'll be amazed just how much it changes your photography for the better!
This blog was written by Nigel Hicks, a hugely experienced Devon-based professional photographer. Nigel works with the USA's prestigious National Geographic Image Collection, among many other bodies, and is a Fellow of the British Institute of Professional Photography.
Nigel runs regular photography workshops in southwest England. To find out more about these, go to https://www.nigelhicks.com/photography-workshops-courses/.
To find out more about Nigel's work in general, feel free to take a tour of his website at www.nigelhicks.com.
Specialist photography insurance through Ripe
As you add accessories to your photography kit, you may want to protect your camera and accessories with specialist photography insurance.
At Ripe, we arrange cover that can be tailored to fit your exact requirements, so you only ever pay for what you need. You can cover up to £60k of equipment for theft and accidental damage so that you can enjoy your shoots with peace of mind.
Find out more about specialist photography insurance, or get a quick online quote today.
Please note the information provided on this page should not be taken as advice and has been written as a matter of opinion. For more on insurance cover and policy wording, see our homepage.
Please enter a valid email address.
Please Please tick one of the boxes below.
Let's stay in touch. Sign up to receive special offers and exclusive discounts.
Your data is safe with us and you can unsubscribe at any time. For more information, please see our Privacy policy.
Thank you for subscribing, you’ll be hearing from us soon!