
A Guide To Coastal and Seashore Photography

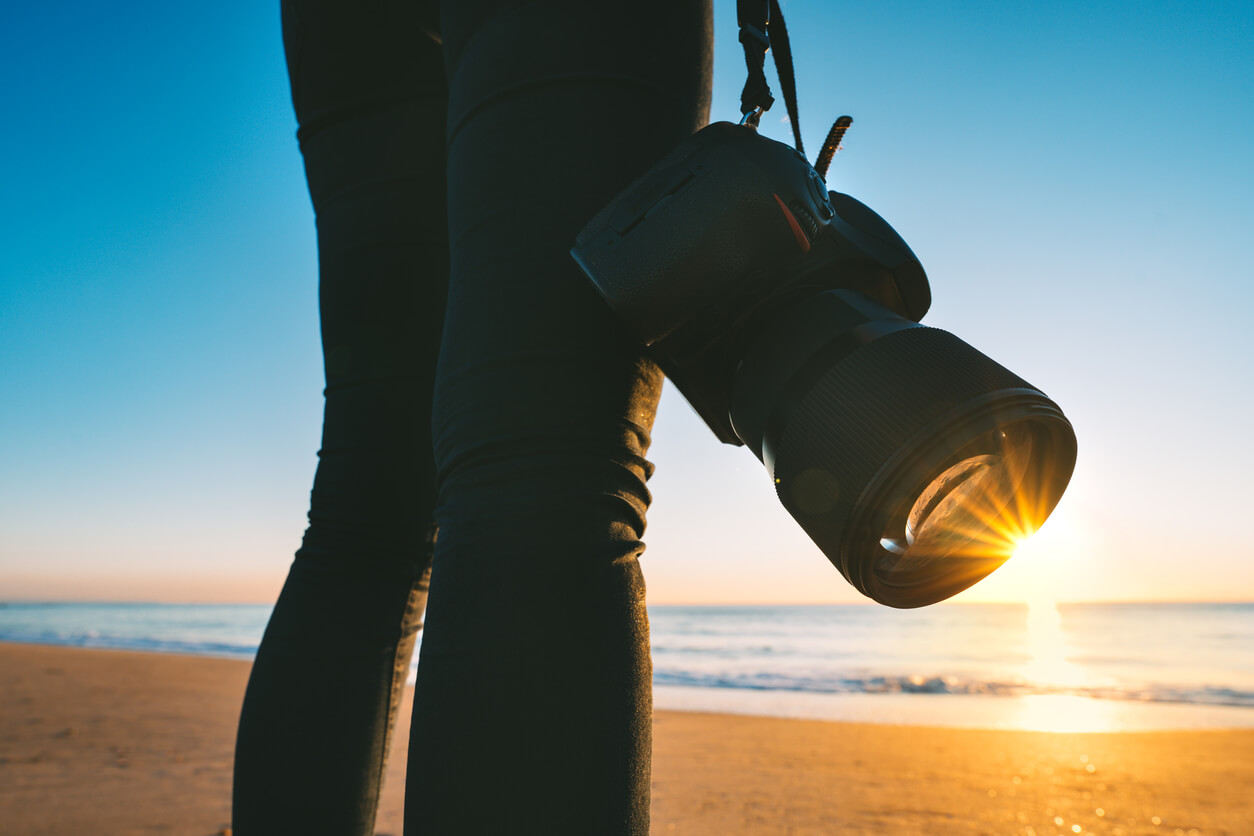
With so much coast encircling our island, coastal photography is unsurprisingly a major subject for Britain's landscape photographers. Hugely variable, from sheltered estuaries to calm sandy beaches backed by sweeping dunes to wild, wind-swept and rugged cliffs, the coast offers endless photography opportunities. What's more, they remain photographable throughout the year, making the coast a massively viable landscape photography option regardless of the season.
Add in the infinite number of possibilities created by ever-changing weather and tides, and the photographic options are almost limitless. It’s almost impossible to run out of photographic inspiration. However, this can make it a little bewildering to know what to shoot. This article aims to provide pointers to inspire your seashore and coastal photography.
Where Sky, Sea and Land Collide

Coastal photography is, of course, photography of the point where marine waters meet the land, but within that definition, it can range from wide views of cliff, rock, sea and sky scenes all the way down to close details of patterns in rocks or wet sand.
So, you need to be flexible and versatile, adapting your choice of subject matter and the method of shooting quickly as conditions evolve. I'm going to dissect those subjects and the shooting methods to provide a guide to the options.
The Wide Coastal View
This is probably where most of us start with our coastal photography: wide sweeping views of a sunlit bay, perhaps the view leading along a golden sandy beach towards a distant headland. Such a view could well be shot in the light of a warm sunny summer's day, with the sun quite high and behind the photographer, rendering the sea a glorious blue, the sand blindingly yellow-white.
Such a shot conjures up something very beautiful and really captures the sense of summer beauty and warmth, but in terms of photographic technique, it’s deceptively straightforward and is often simply a record kind of shot. It's a worthwhile image to have in the collection, but generally, it's not creative or artistic.
Unfortunately, the apparent ease with which this kind of shot can be taken can be a pitfall in itself, making us lazy and sloppy in our technique. So here's a list of points to watch out for and to check before pressing the shutter button:
1. Assuming the image will contain a horizon, make absolutely certain it is level. A sloping horizon ruins so many coastal images.
2. If your image contains any foreground, you'd better be sure that it’s a really interesting one. So many images of great subjects are ruined by a bad foreground that hijacks the eye of the viewer and won't let them get past it to the main subject. We’re talking expanses of dull grass, tangled brambles, featureless shingle or rubble, or even an empty expanse of sand. If you can't find a viewpoint free of such interference, then you've not found the right viewpoint. Don't shoot. Keep searching. What’s needed in a foreground is something that, yes, takes the viewer's attention but then leads their eyes into the scene, directing them straight to the image's main subject. Here, we're talking about perhaps a triangular or diamond-shaped rock or pool of water, or the line of the cliff, or perhaps the leading edge of the surf as it peters out on the sand, all pointing diagonally, like an arrow directing the viewer's eyes towards the image's subject.
3. Even when both sea and sky are blue, the former is usually darker than the latter. The difference may seem negligible to the eye because it can accommodate a vast contrast range. However, the digital sensor is much less sophisticated, and the difference between a dark blue sea and a pale blue sky may be more than it can cope with. The result is an image where the sea is far too dark, and the sky is rather washed-out, cloud patterns barely visible. The solution is to use a neutral density graduated filter (ND-grad) in front of your lens. This half-dark, half-clear, rectangular filter aligns so that the dark part is over the brighter sky, resulting in the sea being lightened and the sky darkened.
This reduces the contrast range to something that the camera's sensor can cope with and results in a more evenly balanced image, in which more of the darker and paler details (such as white clouds) are clearly visible. In short, the resulting image better captures what you saw with your eyes.
4. With wide views of almost any landscape scene, not just coastal views, it’s usually important to have all of the image sharp, from shortly in front of the camera all the way to the horizon. In other words, you need to have a big depth of field. This is achieved in two ways: by using a wide-angle lens and a narrow lens aperture (i.e. a high f-number). Shooting in this way nearly always means quite a slow shutter speed, even in the middle of a sunny day. Hand-holding the camera in this situation risks camera shake, resulting in all the images being blurred, simply because it hasn't been possible to hold the camera steady. Image stabilisation/vibration reduction reduces this risk, but it’s still a major consideration. The solution is to put the camera on a tripod; then, it doesn't matter how slow your shutter speed is, as the camera will be steady. It will also help you ensure the horizon is completely level.
These four rules are fundamental to just about all coastal landscape photography. Once you've made them integral to your photography, then you can move on to more creative stuff.
Shooting the Beach Without Actually Shooting the Beach

This may seem like a rather strange thing to say, but it's about the mantra, 'less is more'. Don't try to show everything in the image; doing so will result in an image cluttered with too much stuff or with the main subject too small and insignificant. Instead, pick out a vignette of the scene – something that captures only a part of the view but tells a story about the whole scene.
It's a ploy I apply to just about any coastal photography that includes a large expanse of sand. When photographing a big beach, the last thing you should do is photograph a view of the whole beach. Doing so will result in an image of merely a large empty space, devoid of a firm subject and hence impact. Instead, what you need is a strong foreground composition, something that grabs the attention and becomes – photographically speaking - the main subject of the image.
Such foregrounds could be a sand dune, or more particularly a line or cluster of grass on the slope of a dune, or down on the beach itself, a pool of water, perhaps with a nice triangular set of rocks on the far side, all hooking the viewer's eye with the beach in the background.
Although I've described this technique in terms of shooting effectively on a large beach, it also applies to many other aspects of coastal photography. It's simply a matter of emphasis. In the above example, I wanted to photograph the beach, but I've honed in on a convenient foreground element to hook the eye, set up a great photographic composition, and shown the beach almost as an incidental.
Change the emphasis a little, and now that foreground element becomes your intended image subject, with the background sand, water or sky simply a very convenient backdrop free of confusing and competing clutter. Images of surf washing around rocks or rolling up onto a sandy beach, or the sweeping curves of a dune, all become the main compositions.
Moving in Close

Coming in closer brings us to photography of details: patterns in the surface of a rock or cliff or rippled sand revealed at low tide, for example. Such details are easily overlooked, but they’re the stuff of great photography.
Rippled wet sand and little rivulets of water carving mini-gorges through it can all come together to create stunning photography. This is particularly so when shot looking into the light, with the ripples and rivulets back-lit. If shooting with the sun behind you, these patterns are often barely visible. But, change your perspective by rotating yourself 180o. Suddenly, those little banks and dips become mountains and gorges, with the surface texture clearly and starkly picked out by the contrast between the sunlit highlights and the deep shadow areas.
The Time of Day
Most coastal photography is done during the middle of the day during summer, when the sun is quite high. While images shot under these conditions can look very 'summery', giving us the idea of warmth and holidays, they rarely appear atmospheric or artistic. For that, we need a low sun either in the midst of winter, early in the morning, late in the afternoon/evening, before sunrise or after sunset.
A low sun will give a golden light richly reflected in sand and water, while shots taken with the sun below the horizon will give images either with pinks in the sky or a deep blue or violet hue if shot when it is close to darkness. Such shots can be extremely atmospheric, creating a strong mood and artistry.
A low sun also, of course, creates possibilities for photography of silhouettes. When applied to coastal photography, it can result in contrasting images; the sun sparkling brightly off the water and set against deep black silhouettes of boats, rocks and cliffs/headlands.
The success of a silhouette image is, of course, very much about the outline shape of the subject, not the detail within it, so you have to ensure that your subject silhouette has a great shape – a nice boat, some jagged rocks, or a finger-like headland, for example. You don't want is a big block of solid blackness in the image, whether that be a large hulk of a rock or an expanse of almost featureless sand.
Shutter Speed: Fast vs Slow

Anyone taking quick snaps of coastal views will almost certainly want to hand-hold the camera, and so for this reason, will shoot with a moderately fast shutter speed, say in the 1/60-1/250 second range. There’s also often the temptation to want to freeze any movement in the water, and so for this reason, too, you would use these shutter speeds.
However, images taken in this way can look static and lifeless, the water stationary and devoid of the dynamic energy you felt in real life.
For creative photography in which depth of field and mood are crucial, you will often want to use something much slower, something that captures the dynamism of the sea, putting over both mood and the sense of movement. Blurring the movement of the sea, particularly as it washes over and around rocks or rushes up a sandy beach, is the best way to put over the sense of dynamic energy and movement. For this, you need to use a slow shutter speed, anything from, say, 1/10 second to 30 seconds or even more. Obviously, the type of blur you get will vary significantly depending on the shutter speed - 1/10 second leaving the waves and spray still quite visible, but 30 seconds rendering the water as a smooth silken sheet.
Clearly, it’s easy enough to use as slow a shutter speed as you like at dawn or dusk, but it's quite another matter in the middle of a sunny day. At this time, there’s too much light to slow the shutter speed down enough without causing the images to be massively over-exposed. The solution is to use a neutral density filter, which reduces the amount of light reaching the sensor when placed in the front of the lens. These are available in several strengths and make it perfectly possible to use a very slow shutter speed even on a sunny day. They can also be combined with an ND-grad filter, one reducing the overall exposure, the other darkening a bright sky.
There are various occasions when a fast shutter speed (at least 1/500 second) may well be effective. For example, when you want to freeze the movement of water droplets mid-air as waves crash onto a beach or rocks. For this to work, however, you need large waves generating powerful surf and a strong telephoto lens to really hone in on those flying droplets.
Powerful waves breaking onto shore can look and feel very dramatic when watched, but if photographed with an ordinary lens, they’ll appear small, limp and disappointing in the final images. To make the photographs work, you need to really hone in on the waves and make them as big as possible in the frame. Hence the need for a strong telephoto lens.
Safety First

Finally, a word on safety. While there’s lots of fun to be had with coastal photography, we must never take the sea for granted, especially if shooting during winter. When photographing close to the sea's edge, always be aware and cautious of the movement of the waves: they do not come up to the shore with constant regularity. Instead, they show cyclic batches of small waves followed by bigger ones.
A series of small waves may tempt you to move closer to the water's edge, only for you suddenly to find yourself confronted by a series of large waves rushing towards you. Take great care with this.
Always make yourself aware of the tides, too. This should be part of your photographic planning, but it’s of enormous safety importance, too. Not only will surf come up the shore with a lot more energy on a rising tide, but you may also need to know what the risks are of being cut off.
Similarly, make sure you check the weather forecast before hitting the coast. Things can turn ugly very quickly, especially when you're trying to photograph in stormy conditions. Be well aware of what you might be letting yourself in for, and be prepared for it.
In other words, do your homework before heading to the coast, take care while you're there, but have an enormous amount of fun, and come home with some wonderful, creative, artistic photos!
This blog was written by Nigel Hicks, a hugely experienced Devon-based professional photographer. Nigel works with the USA's prestigious National Geographic Image Collection, among many other bodies, and is a Fellow of the British Institute of Professional Photography.
Nigel runs regular photography workshops in southwest England. To find out more about these, go to https://www.nigelhicks.com/photography-workshops-courses/.
To find out more about Nigel's work in general, feel free to take a tour of his website at www.nigelhicks.com.
Specialist photography insurance through Ripe
As you head out and about with your photography equipment, you may want to protect your camera and accessories with specialist photography insurance.
At Ripe, we arrange cover that can be tailored to fit your exact requirements, so you only ever pay for what you need. You can cover up to £60k of equipment for theft and accidental damage so that you can enjoy your shoots with peace of mind.
Find out more about specialist photography insurance, or get a quick online quote today.
Please note the information provided on this page should not be taken as advice and has been written as a matter of opinion. For more on insurance cover and policy wording, see our homepage.
Please enter a valid email address.
Please Please tick one of the boxes below.
Let's stay in touch. Sign up to receive special offers and exclusive discounts.
Your data is safe with us and you can unsubscribe at any time. For more information, please see our Privacy policy.
Thank you for subscribing, you’ll be hearing from us soon!